Have you ever wanted to cook on a charcoal grill but didn’t know how? This blog post will teach you everything that you need to know about starting your charcoal grill. It’ll help show you what supplies and tools are needed, what the best techniques are for lighting your fire, and more!
How To Choose The Right Charcoal?
Charcoal is a product of slow-burning wood in a low-oxygen atmosphere. You can usually get it in two forms on the market: briquettes or natural lumps.
Lump charcoal is often considered as the best option since it produces less ash than Briquettes.
Briquettes, on the other hand, are easier to measure and lighter. And, contrary to some sites’ assertions that they include fillers, they are mostly composed of lump charcoal that has been bonded with cornstarch.
The most efficient charcoal for grilling is whatever is readily available; even BBQ champs buy whatever is on sale.
What is the Recommended Amount of Charcoal to Use?
As with the kind of charcoal used, the quantity of charcoal used will vary according to the heat and cooking time needed for the meal. We suggest 1/2 to 3/4 of a charcoal chimney for the majority of chefs who cook on a daily basis.
Between half and three-quarters of a chimney may be a reasonably safe guideline. Bear in mind that a shortage of charcoal may result in your grill not receiving enough heat, while an abundance of charcoal can suggest that it is excessively hot. Utilize less charcoal while cooking at a low temperature and for an extended period of time. Increase the amount of charcoal you use for fast, hot cooking.
If there is no chimney, use the amount of charcoal required to completely cover the bottom of whatever surface you are cooking on. If the charcoal starts to smoke during an extended cooking period, replenish the pile and continue cooking.
| Amount of Charcoal | Cook Time | Temperature | Grill Size |
|---|---|---|---|
| ¼ chimney | Slow | Low | Small, Medium, or Large |
| ½ to ¾ chimney | Medium | Medium | Medium or Large |
| ¾ to 1 chimney | Quick | High | Large |
4 Ways To Start A Charcoal Grill
#1 Lighter Fluid Method
This is the most probable method that the majority of people are familiar with. Additionally, this is the technique with which you are most prone to make errors. Not only is it highly hazardous and possibly lethal, but it may also spoil food by imparting a fuel-like flavor.
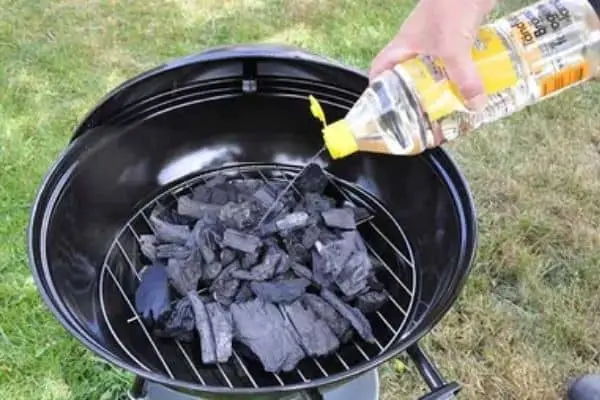
To ensure a good start, stack your coals neatly in a pyramid or mound form. Pour light fluid over the charcoal, paying special attention to the core, which requires the most heat. 3 tbsp lighter fluid per pound of charcoal If you utilize an excessive amount of fuel, it may result in flare-ups.
To ignite the fuel quickly, you may use an extended match or grill lighter. It is critical to act immediately since the fuel will evaporate if left in the fire for an extended period of time.
We will never spray lighter fluid over a live flame, and we emphasize never. While the resulting flare-ups are entertaining to see, they are also difficult to manage and therefore very dangerous. Although it may seem to be nothing, rapidly igniting that initial layer will ignite the fire.
After the liquid has been consumed, the carbon will continue to burn and form an ashy, gray coating. When all of the coals are completely covered in ash (approximately 15 minutes), they are free to be spread out and cooked!
#2 Charcoal Chimney Starter Method
A charcoal chimney starter is a massive cylindrical metal drinking cup. A grille separates it into two sections. Additionally, the structure’s body is pierced with holes, which aid in the propagation of the flame.
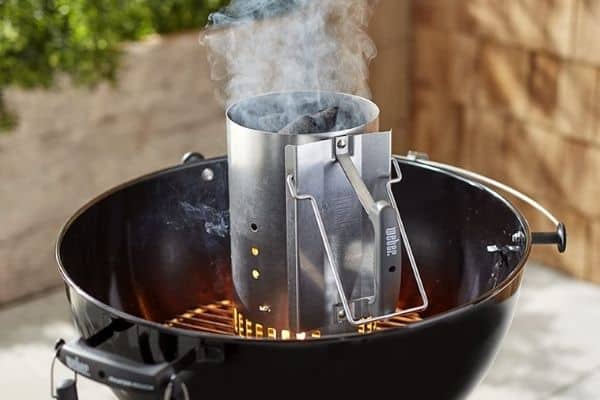
The charcoal chimney utilizes a phenomenon known as chimneys to ignite your charcoal. It is possible to pour unlit charcoal into the chamber above. You start a fire in the bottom room. chamber underneath. The bottom charcoal becomes engulfed in flames, gradually igniting the remaining coals. When heat rises, it draws in more air from the bottom and all openings. After about 20 minutes, you’ll have a charcoal-lit chimney.
This item may be purchased at any hardware shop or at the same place where you purchased your barbecue. If you’re feeling adventurous, you might even construct your own. All you need to create a chimney starter are a few wadded-up newspapers, a lighter, and a match.
Instructions:
- On the bottom grate of the grill, put the empty chimney starter.
- Ensure that the chimney is completely filled with charcoal. Utilize less to reduce the size of a grill or to produce less heat.
- Remove the chimney and cover the grate with lighter cubes.
- Using an electric lighter, fire the chimney and then place it on top.
- Alternatively, you may put a rolled-up newspaper underneath the base of the chimney. Light it to ignite the coals.
- As soon as the charcoal at the bottom of the chimney has turned grey with ash, pour the hot coals over the grate.
#3 Electric Starter Method
If you’re looking for a fast and dependable way to begin your charcoal burning, an electric starter for charcoal may be an ideal replacement for the chimney. It is a simple gadget consisting of the burner component of a standard electric stove bent into the form of a “U” and an accompanying handle. The “U” shape burner keeps your coals warm, while the handle provides convenience and security.
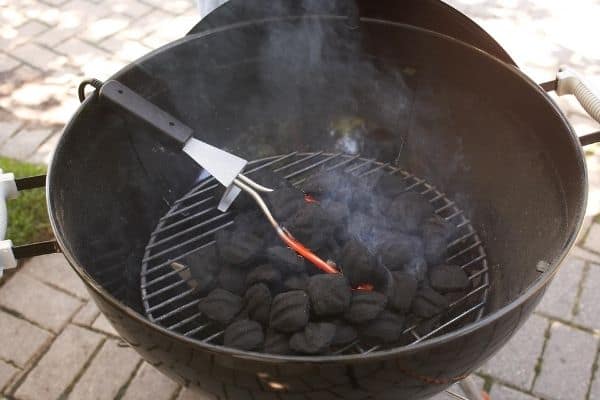
All you have to do with this gadget is pile the charcoal on the heating element, connect the cord, and wait for the charcoal to heat up. Then, insert the charcoal into the grate, adding more as needed, and begin cooking. The whole procedure is simple and fast.
Nevertheless, it is not all. If you’re prepared to spend a little more, you may buy higher-end electric starter versions, such as the Homeright Electro-Torch. It incorporates a heater and an air blower into an oblong tube equipped with a handle. Allow Tim “the Toolman” Taylor no access to your air conditioner or heater. Rather of immediately heating the charcoal, the heating element warms the air before blowing it over it, rapidly and evenly lighting it.
To use this device, just arrange your coal in a heap or straight on the grate. Connect your electric starter and orient it so that its snout is towards the coals. When the coals begin to burn, you may adjust the distance. Once all of the embers are hot, scatter them and immediately begin cooking.
Electric fire starters have the benefit of being quick and simple to operate. They’re unmatched in these areas and can really simplify the process of igniting your charcoal barbecue. Because no chemical, additive, or other substance is used to get your charcoal started, you won’t have to worry about unpleasant residues, whether they’re chemical odors, food residues, or excess ash on your grill that drifted about and adhered to food.
Along with the disadvantages, electric starters need power. This implies that you will be able to use one only in places with access to power. Additionally, you must include in the cost of energy consumed on a continual basis, or operating cost. For grillers who reside in distant locations, electric starters are not an option. If you’re an adventurous camper, choose charcoal chimneys.
#4 Looft Lighter Method
A looftlighter is a small firearm used to ignite the charcoal. It costs somewhat more than comparable heat guns on the market.
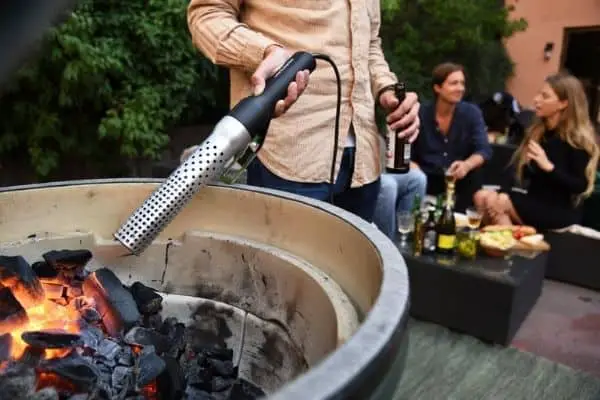
It does not rely on gas or chemicals but rather on superheated air. According to experts, it has an extended handle and a secure shell that allows you to ignite your charcoal from a safe distance. The cannon is compatible with a wide variety of fire pits, smokers, and barbecues.
The flame can reach 1250 degrees Fahrenheit, which is sufficient to ignite your grill in less than a minute.
Furthermore, contrary to lighter fluids, they are environmentally benign due to the use of super-heated air. There is no need to be concerned about CO2 or other hazardous gas emissions.
The following are some steps to follow while using this equipment:
- Once your charcoal is prepared, attach your looft lighter to a power source.
- Aim the gun’s tip toward the charcoal’s base.
- The charcoal will begin to glow, indicating that you may now remove the pistol from it.
- Allow for self-ignition of the charcoal.
In general, the Looftlighter is a useful gadget that may be used both inside and outdoors.
Conclusion
I hope you found these tips helpful and that they make grilling a little easier for you, too! If anyone has any other techniques on how to start a charcoal grill, please comment below and share them with the world. Thanks so much for reading our blog post today! We’ll be back soon with more information about food safety or backyard BBQing best practices – stay tuned!
