
An electric smoker is a great way to cook food without using much gas or wood. It can be used indoors, and it’s easy to use. This article will show you how to use an electric smoker so that you can enjoy the delicious flavor of smoked meat with minimal effort.
What is an electric smoker?
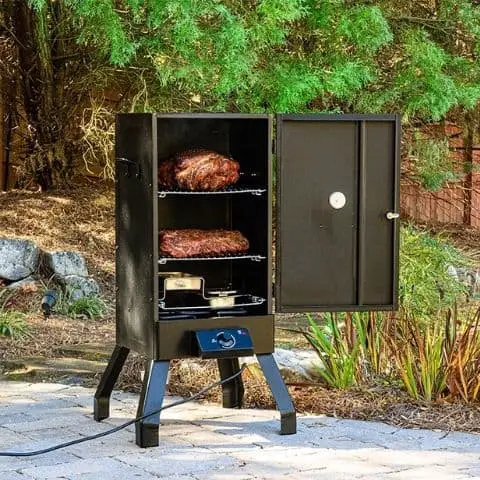
An electric smoker is an electrical appliance that is used to smoke food. Smokers are generally larger than grills and the cooking chamber is separate from the firebox in most cases.
Electric smokers make use of an electric heating element which allows people to control the temperature more precisely than with other types of smoker, though it can still be difficult to do so without getting too much external help from apps or-in thermometers. The actual act of smoking meat is also much more hands on with an electric smoker than it would be with other kinds.
The convenience and lower price point on some models makes them a popular choice for beginning smokers, but they are by no means the best. Many people upgrade to propane or charcoal after experiencing what these types of smokers can do.
Electric smokers are great for cold climates, campers, or anyone that finds themselves in need of a quick meal without having access to traditional methods like propane. They’re not usually suitable for large-scale production because they can’t produce enough heat (though there are some exceptions) and aren’t very good at maintaining temperature over prolonged periods of time which becomes problematic when you want smoked meat ready hours before dinner.
The best thing about electric smokers is their convenience. Many models use less power than a small light bulb which means they can be powered by batteries making them great for tailgating, camping trips, backyard picnics, and anyone with an RV or other recreational vehicle. They still require access to a source of electricity so if you don’t have one nearby you’d better plan ahead! Some people even opt for solar panels in order to get the most out of their smoker while being off the grid.
All in all, electric smokers are an interesting appliance that hasn’t really found its place in society- perhaps because there aren’t any jobs available as smoked meat taste testers. If having a lot of time and money spent on doing complicated things isn’t your thing, then perhaps it’s time that you came into possession of an electric smoker.
Why should you use an electric smoker?
Grills are often considered more versatile because they can accomplish the same tasks – grilling, smoking, baking and roasting – while smokers are usually more specialized.
Electric smokers also provide some conveniences that traditional smokers do not.
First, there’s no need to soak wood chips before using them in an electric model because it uses a small heating element to generate smoke instead of actual coals or flames. This means all the wood needs is a little bit of time to heat up inside the smoker before it starts producing smoke on its own.
Second, many models have built-in thermometers that show accurate internal temps without opening the lid.
Third, most have adjustable racks so food can be kept close to the heat source for fast cooking or as far away as possible for slow roasting. Finally, there is no need for a water pan because most electric smokers use an enclosed chamber that is already water tight.
How to use an electric smoker properly
1) Your electric smoker should be seasoned
Seasoning your electric smoker isn’t required, but it will help prevent rust and generally make the unit more durable. To season your electric smoker, simply coat the inside with cooking oil and heat at maximum power for about an hour to burn off any remaining machine oils that were used in production or transport. You can then wipe out the interior with a paper towel and you’ll be ready to smoke some delicious meats.
2) Power on the electric smoker
Before you get any meat ready, turn on your electric smoker and allow it to get up to temperature. Electric smokers have a precise temperature setting that they maintain, so the preheat phase will vary in duration based on how hot you set the machine to run at. On average, a new unit will require about 30-40 minutes of preheating before it’s ready for use. While you’re waiting for your electric smoker to warm up, go ahead and start preparing some delicious meat to place on the racks inside the device.
3) Add wood chips
Once your electric smoker is up to temperature and the preheat cycle has completed, it’s time to add some delicious wood chips for smoking. Wood chips can be soaked in water before use if the manufacturer recommends this step, though this isn’t required as it won’t affect the finished product. Placing a handful of wood chips into the firebox and closing the door will immediately start producing smoke that you can use to infuse flavor into meats. The exact timing of adding smoke depends on the type of meat you’re cooking, but plan on about an hour per pound or so. Smokers should never be left unattended during operation because a malfunction could cause a fire or charbroil meat instead of it properly.
You should also open the door, remove the wood chips after they’ve completed smoking, and replace them with fresh chips every couple of hours to keep up a steady stream of flavorful smoke.
4) Preheat
Electric smokers come with a temperature control system that’s programmed to maintain the target temperature you set. If you’re cooking something for the first time, be sure to keep an eye on its internal temperature to avoid overcooking. Preheating an electric smoker should take roughly 30 to 40 minutes depending on the model, so you can go ahead and get your ingredients ready.
5) Put a water container inside
Another trick to ensuring your meat is cooked properly is to place a container of water on the lowest rack inside the smoker. Keeping moisture in the unit will help prevent any cracks from developing, and it also helps produce some steam that prevents the food from being over-cooked. The water should remain at an even temperature without any additional effort on your part because of this feature, but always check to make sure it remains full before or after preheating if you’re smoking large quantities of meat overnight.
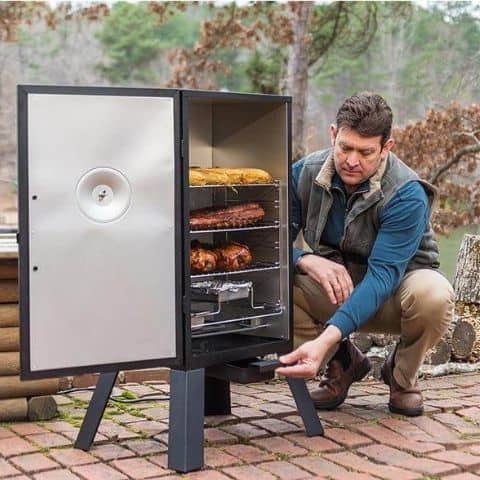
6) Prepare the meat

Before placing your seasoned meats inside the electric smoker, make sure they’re already cut to fit properly. Meats should always be placed on the top racks of a smoker because they cook from the heat that rises underneath them, and this won’t work if there aren’t enough racks for you to arrange it. If you want an even smoke flavor without having to refill wood chips during operation, simply wrap them in foil before placing them on one of the top racks. The meat will absorb the smoky flavor gradually as each piece cooks, so there isn’t really any need to risk adding too much with fresh chunks.
7) Get cooking
After you add the meats to your electric smoker, go ahead and start cooking! The length of time it will take to cook meat depends entirely on the type of cuts you choose. Most foods should be cooked for between 4 and 10 hours at a temperature range between 240 and 270 degrees Fahrenheit, though some cuts only require 2-3 hours while others may need up to 18 or so. If you’re smoking large cuts like ribs or whole turkeys, increase the temperature slightly after adding them in order to help accelerate cooking time.
8) Always keep an eye on the electric smoker
Every electric smoker will come with its own unique quirks and malfunctions, so be sure to stay close by whenever you’re using one. This is especially important during the first few uses because you need to familiarize yourself with how it works. Stay near enough to constantly check the meats for cooking progress, to refill the water if needed, and to plug any malfunctions or signs of grime that might cause a fire.
Recipes that can be used in your new electric smoker
Here are some tasty recipes that can be made with most electric smokers:
Smoked Whitefish Spread (Cream cheese, chives, smoked whitefish)
Place cream cheese in a bowl. Mix in finely chopped chives and flaked smoked whitefish until combined thoroughly. Serve with crackers or toasted pita bread triangles. If desired, add garlic powder, pepper or onion powder to taste. Smoked Pork Tenderloin
Brush tenderloin with olive oil on all sides. Season liberally with salt and pepper on all sides, put in smoker for about 3 hours at 275 degrees Farenheit using apple wood chips
Hickory-Smoked Baby Back Ribs
Rub down ribs with your favorite dry rub and let sit for about an hour. Preheat smoker to 200 degrees Farenheit and add apple wood chips, put ribs in smoker and cook for 3 hours or until tender.
Cherry-Smoked Chicken Thighs
Season chicken thighs with salt and pepper on all sides. Place thighs skin side down in a nonreactive container just large enough to hold them flat in a single layer (a zip-top plastic bag works well too). Cover with cherry juice or other fruit liquid of choice then seal the container airtight. Place the container into the refrigerator overnight so that it becomes infused with flavor from the fruit liquid and any seasonings you added. Preheat smoker to 250 degrees Fahrenheit and add cherry-flavored wood chips. Place chicken thighs on the grate with a drip pan underneath and cook for 2 hours or until juices run clear when you poke them with a fork. Remove from smoker and serve warm.
Pineapple-Smoked Pork Chops
Season pork chops liberally on both sides with salt, pepper, garlic powder and any other seasonings desired such as onion powder, chili powder or cayenne pepper (optional). Put into a zip-top plastic bag or non-reactive container just large enough to hold the pork chops flat in a single layer. Pour pineapple juice over the top of the meat then seal airtight. Place in refrigerator overnight so that it becomes infused with flavor from the fruit liquid and any seasonings you added. Remove chops from bag or container and put into the smoker at 250 degrees Fahrenheit with hickory-flavored wood chips. Cook for 2 hours or until juices run clear when you poke them with a fork. Remove from smoker and serve warm.
Conclusion
Now that you have a better understanding of how an electric smoker works, it’s time to take the plunge and purchase one. This is a great option for someone who doesn’t want to spend too much money on a gas or charcoal grill but still wants complete control over their cooking process from start to finish. And with these 8 steps to use an electric smoker, there will be no more guesswork involved. Electric smokers are super easy-to-use and can give you perfect results every single time!