
How to smoke a fresh ham is an art that requires time, patience, and the right knowledge. Whether new to the smoker or an experienced hand, following these five simple steps will guarantee success in your quest for smoked perfection.
From selecting the best ham for smoking to setting up your smoker and finishing off with serving tips – let’s get started on our journey towards perfecting smoking a fresh ham in 5 simple steps!
Smoke a fresh ham like an expert by understanding how rubs can enhance flavor when adding wood chips for maximum smokiness and what temperature should be maintained throughout cooking.
The temperature should remain around 225°F (107°C) during this time period for optimal results. Smoke for 3-4 hours until an internal temperature of 145°F (63°C) is reached
With just a few basic tools, such as tongs, a thermometer, and a basting brush, we’ll have everything we need before getting started on this delicious task.
So put away those store-bought hams because it’s time to create something exceptional: smoke a fresh Ham in 5 simple steps!
What is the Best Ham for Smoking?
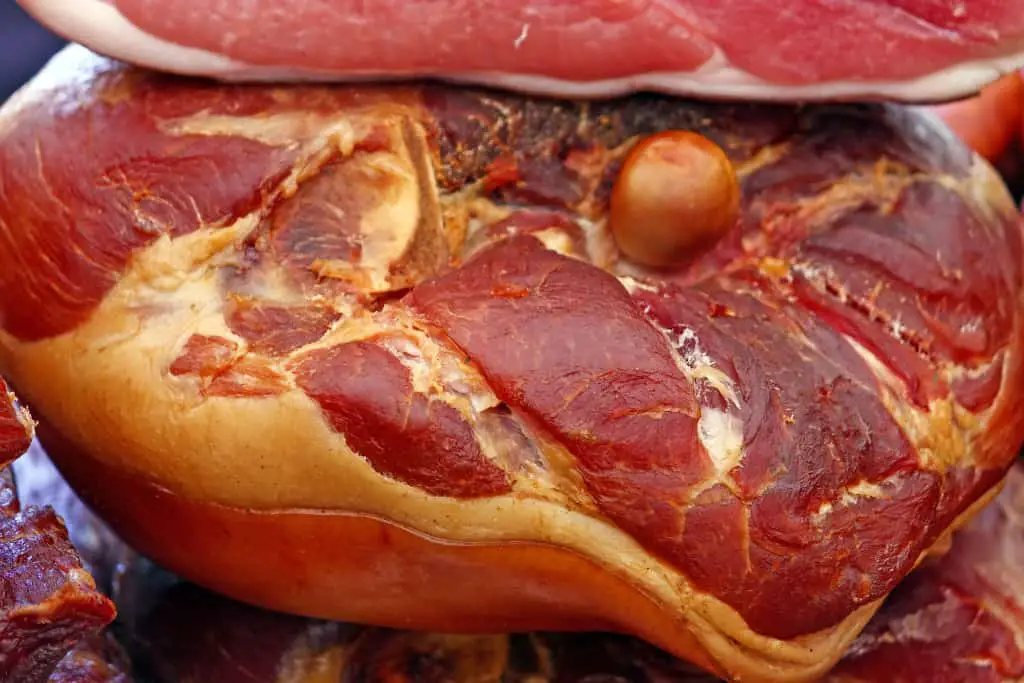
When it comes to smoking a ham, the cut of meat you choose is just as important as the type. Fresh hams are usually sold with their skin on and can be smoked whole or in pieces. Cured hams, such as country-style hams, are already cooked and should only be smoked for flavor.
Preparing the Ham
Before smoking any ham, trim off any excess fat from around the edges and remove all giblets that may have been included in your purchase.
If you’re using fresh ham, soak it overnight in a brine solution before smoking to ensure maximum smoky flavor absorption during cooking.
Rubbing the Ham
Once your ham has been prepped and soaked (if necessary), it’s time to rub down your meat with seasonings of choice before smoking.
Popular options include garlic powder, onion powder, paprika, cumin, or chili powder – but feel free to get creative.
Ensure every inch of your ham is covered for optimal flavor infusion throughout the smoking process.
Setting Up The Smoker
The next step is setting up your smoker according to manufacturer instructions; whether you use a charcoal smoker, a pellet smoker, or an electric smoker, this includes ensuring proper temperature settings based on the type of wood chips used (hickory or mesquite work well).
For best results when smoking a large piece like a whole ham, set up two separate piles of charcoal briquettes – one at each end of the smoker box – so heat circulates evenly throughout the cooking process without burning the outer layer too quickly before the interior has had the chance to cook through properly.
Once everything is set up correctly inside the smoker box (including a water pan if applicable), place the prepared and rubbed-down piece(s) directly onto the grates above the coals/wood chips.
Then close the lid tightly shut over the top – making sure not to let smoke escape while maintaining a consistent temperature inside the cooker box between 225°F–250°F throughout the entire cooking process, which typically takes about 1 hour per pound, depending on the size/cut being smoked.
Keep checking periodically until internal temperature reaches 145°F–160°F when tested with a digital thermometer inserted into the thickest part center portion near the bone structure area
Once done, turn off the heat source and allow the meat to rest for 10 minutes before serving it warm right away or storing it in a cool place until ready to use later.
After removing the finished product from the smoker box, carefully transfer it onto a cutting board and then slice thinly against the grain texture.
Serve immediately alone or on a platter, with side dishes such as your favorite BBQ sauces, coleslaw, potato salad, etc. Enjoy with family and friends alike.
When it comes to smoking a ham, the best option is one that has been cured and smoked already. Now let’s move on to preparing the ham for smoking.
Preparing the Ham
Preparing the ham for smoking is an important step in ensuring a delicious, juicy result. Before you begin, trim off any excess fat and rinse it off with cold water. Pat dry with paper towels to remove any moisture that may have been left behind.
Brining and curing the pre-cooked ham (optional) can add extra flavor and help keep it moist during cooking.
To brine your ham, submerge it in a solution of salt, sugar, herbs, spices, or other seasonings overnight or up to 24 hours curing period before smoking.
This will give your meat a more delicious flavor during the curing process and help preserve its natural juices while cooking.
You’ll also want to make sure that your smoker is set up correctly before beginning the process of smoking the ham.
Make sure there’s enough fuel in the firebox so that you don’t run out mid-cooking; this could cause uneven heating which would affect the quality of your final product.
Additionally, check that all vents are open so smoke can escape properly from inside the chamber and ensure even heat distribution throughout your cook time.
Once everything is ready to go, place your pre-cooked ham on a rack inside of your smoker and close the lid tightly, so no smoke escapes during cooking time.
This will ensure maximum flavor absorption in every bite. Set the temperature according to manufacturer instructions for best results; usually, around 225°F should do just fine for most hams.
You should always refer back to specific instructions if available when using certain types of smokers or grills like pellet grills or kamado-style cookers where temperatures vary slightly from traditional smokers/grills.
Finally, cook until the internal temperature reaches 140°F (about 2-3 hours and may up to 7 hours, depending on size).
Once done cooking, remove from smoker immediately and allow to rest for at least 10 minutes before serving.
This helps redistribute all those tasty juices evenly throughout each slice.
Once the ham is prepared, it’s time to rub it with your favorite seasoning blend to give it that delicious smoky flavor.
Now let’s move on to the next step of rubbing the ham.
Rubbing the Ham
Rubbing the ham is an important step in preparing it for smoking. It helps to infuse flavor and create a delicious crust outside of the meat.
To begin, you’ll need to make a rub by combining spices such as garlic powder, onion powder, paprika, black pepper, and cumin in a bowl.
Once combined, use your hands or a spoon to rub this mixture all over the ham.
Make sure that every inch of the surface is covered with your spice blend before letting it sit for at least an hour so that all of those flavors can penetrate the meat.
When applying your rub to the ham, be sure not to miss any spots. Rub some onto both sides of each slice and around any bone sections if applicable.
If desired, you can add brown sugar or honey into your mix, which will help give your finished product a sweet glaze when cooked through properly.
Additionally, adding herbs like rosemary or thyme will provide even more depth of flavor.
Once you have rubbed down your ham, let it rest for at least one hour before placing it in the smoker so that all those wonderful flavors can sink deep into its fibers and be ready for cooking.
This resting period is essential if you want maximum flavor from each bite once smoked; do not skip this step.
With just these few simple steps, you’ll be able to create an amazing-tasting smoked ham that everyone will enjoy.
Once the ham is rubbed with your desired seasonings, it’s time to set up the smoker and get ready for smoking.
Setting Up the Smoker
Setting up a smoker is an important step in smoking any type of meat, including ham. It’s essential to ensure the smoker is set up correctly and preheated to the correct temperature before beginning.
First, read through your manufacturer’s instructions carefully and assemble the smoker according to those directions. Once assembled, you’ll need to preheat it for at least 30 minutes before adding wood chips or chunks.
The ideal temperature for smoking ham is 225°F (107°C). If using a charcoal smoker, add the wood chips or chunks directly onto the charcoal once it has reached this temperature.
If using an electric or gas smoker, place your choice of wood chips into a smoke box that fits inside your unit.
Make sure there are no gaps between the lid and base so that smoke doesn’t escape during cooking.
Place this on top of your heating element and close tightly with all vents open until ready for use.
Once everything is set up properly, you can begin rubbing down your ham with spices and seasonings before placing it into the smoker chamber on its rack or grates provided by most smokers today.
You should leave enough space around each piece of meat so that air can circulate evenly throughout while cooking to ensure even heat distribution when smoking meats like ham over several hours at low temperatures such as 225°F (107°C).
Once the smoker is set up and ready to go, it’s time to start smoking the ham. The next step is to prepare the ham for smoking so it can be cooked evenly and perfectly.
Smoking the Ham
Before smoking your ham, ensure that you have enough charcoal or wood chips for at least 3-4 hours of smoke before adding them to the firebox or tray below where you’ll place your meat grate (the area where you’ll place the actual food).
Place the rubbed-down and prepared piece of meat onto the smoker grate directly above whatever fuel source is being used (charcoal/wood chips).
Close the lid tightly so that no smoke escapes while the cooking process takes place over the next few hours; the temperature should remain around 225°F (107°C) during this time period for optimal results.
Smoke for 3-4 hours until an internal temperature of 145°F (63°C) is reached when tested with a meat thermometer inserted into the thickest part of the ham away from the bone – if not yet done so already.
When finished smoking, let rest for 10 minutes before slicing into desired thicknesses. Serve warm alongside favorite sides like roasted potatoes or grilled vegetables. Enjoy.
Once the ham is fully smoked, you can remove it from the smoker and move on to the next step: Finishing & Serving.
Finishing & Serving
Once the ham is done smoking, it’s time to finish and serve. Remove the ham from the smoker and let it rest for 10 minutes.
This allows all those delicious juices to redistribute throughout the meat so that when you slice into it, your guests will be rewarded with a juicy, tender piece of smoked goodness.
When slicing, use a sharp knife or electric slicer if available. If using an electric slicer, adjust blade thickness accordingly, as too thin can cause tearing, while too thick can result in dry slices.
Slice against the grain for best results and serve warm on its own or with your favorite sides such as macaroni & cheese, mashed potatoes, or roasted vegetables.
For added flavor, consider adding glazes during cooking, like honey mustard or brown sugar glaze, which adds sweetness and depth of flavor that pairs perfectly with smoked meats. For extra zing, try adding some fresh herbs such as rosemary or thyme at serving time – just sprinkle over the top before plating up.
Finally, don’t forget about leftovers. Smoked hams are great for making sandwiches later in the week by layering thinly sliced pieces between two slices of bread and lettuce, tomato, yellow mustard, or mayo. You can also dice up leftover pieces for salads or omelets; there are plenty of ways to enjoy this tasty treat after dinner is served.
FAQs in Relation to How to Smoke a Fresh Ham in 5 Simple Steps
Can I brine my ham before smoking it?
Yes, you can brine your ham before smoking it. Brining will help ensure that your ham is moist and flavorful when cooked. Be sure to allow sufficient time for proper brining before continuing the smoking process.
Can I add other ingredients to flavor the ham while smoking?
Yes, you can add additional ingredients such as spices, marinades, and rubs to the ham before starting the smoking process. Depending on the flavor profile desired, you can use red wine vinegar, Worcestershire sauce, and even fresh fruit juices for added sweetness. All of these ingredients could be added to the ham during the smoking process in order to ensure that all of the flavors permeate through the meat. When adding additional ingredients, it is important to remember not to overpower the ham with too many intense flavors, as this could render it unpalatable.
What type of wood chips should I use to smoke the ham?
When smoking a ham it is important to choose the right wood chips. Generally, hickory, mesquite, or apple are all good options for producing an intense smoky flavor. Be careful not to use woods such as pine or cedar, as these can impart an overwhelming and unpleasant taste. Other wood chips such as cherry, oak, and pecan also work well if you want a milder smoky flavor. However, these can easily overpower the delicate flavors imparted by the ham, so be sure to experiment with small amounts before incorporating them into your recipe.
Can I reuse the wood chips multiple times?
Yes, you can reuse the wood chips multiple times however it is recommended to discard them after each use. The flavor of the wood chips will diminish over time, and their smoke output will be reduced. Additionally, the wood chips may impart an acrid taste if used for too long, as they can become heavily saturated with fat and other residues from previous smoking sessions. To get the most out of your wood chips, it is best to replace them with fresh ones after each smoking session.
Conclusion
Smoking a fresh ham is an easy and delicious way to enjoy the flavors of BBQ. With 5 simple steps, you can have a succulent and flavorful meal that your family will love.
Whether you’re using store-bought or homemade rubs, selecting the right type of wood chips for flavor, or mastering the art of setting up your smoker correctly, following these steps to smoke a fresh ham in 5 simple steps will help ensure that you get the best results every time.
Are you looking to smoke a fresh ham in just 5 simple steps? Look no further! BBQGrillGuides has all the tips and tricks for making your smoked ham delicious.
From advice on what type of wood chips to use, how long it should cook, and even recipes for flavorful glazes – we have everything you need to make your grilled meal perfect every time. So don’t wait any longer – visit BBQGrillGuides today and start smoking that ham!
